Here are the ports you need to open on your firewall to be able to connect to all servers with ProtonVPN :
- 1194
- 443
- 4569
- 5060
- 80
- 5995
- 8443
Here are the ports you need to open on your firewall to be able to connect to all servers with ProtonVPN :
ProtonMail’s Pro and Visionary plans let you configure a “catch all” address. All emails sent to the domain will end up in that address’s account. However, they all end up in your account’s inbox unless you set up a filter to file them into a special folder as described below.
If you don’t know what a “catch all” is, please see ProtonMail’s official doc on the subject : https://protonmail.com/support/knowledge-base/catch-all/
require ["include", "environment", "variables", "relational", "comparator-i;ascii-numeric", "spamtest", "fileinto"];

# Generated: Do not run this script on spam messages
if allof (environment :matches "vnd.proton.spam-threshold" "*",
spamtest :value "ge" :comparator "i;ascii-numeric" "${1}")
{
    return;
}

# File catchall messages into folder
if header:is "Delivered-To" "catchall@mydomain.tld" {
  fileinto "myfolder";
}
If you want to learn more about writing your Sieve filters scripts in ProtonMail, check out the docs.
ProtonMail is a geat secure and private email provider. They offer end-to-end encryption and their servers are located in privacy-minded Switzerland. If you want to know more about them, head over to Wikipedia.
By default, ProtonMail is pretty good at detecting junk mail and filing it into the “Spam” folder, but it is not marked as “read”. If you’d rather have spam be marked as read automatically, here’s how to do it.
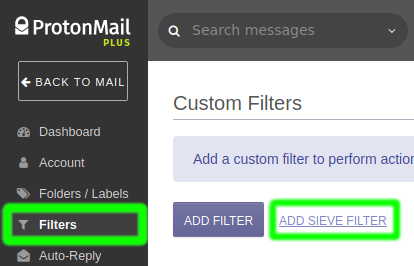
1. Login into your account and head over to the settings.

2. Choose “Filters”, then “Add Sieve Filter”
3. Type in a name for the filter (e.g. “Mark Spam as read”) and replace the contents of the “Sieve Script” field with the following code :
require ["include", "environment", "variables", "relational", "comparator-i;ascii-numeric", "spamtest", "imap4flags"];

if allof (environment :matches "vnd.proton.spam-threshold" "*",
spamtest :value "ge" :comparator "i;ascii-numeric" "${1}")
{
  addflag "\\Seen";
  return;
}
4. Click “Save”, and voilà!
If you want to learn more about writing your Sieve filters scripts in ProtonMail, check out the docs.
Darkice is a utility which lets you capture audio from your desktop and stream it to an Icecast2 server.
On most current Linux distributions such as Ubuntu 20.04, the default configuration does not capture the audio from the sound card properly. Here’s what worked for me and once I knew what to do it was quite easy !
1- In your darkice.cfg file, set the input device to “default” :
[input]
device = default
2- Install the package pavucontrol-qt
sudo apt install pavucontrol-qt3- Launch pavucontrol-qt and go to the “Recording” tab. You should see controls for a “ALSA plugin [darkice]” device, as in the screenshot below.
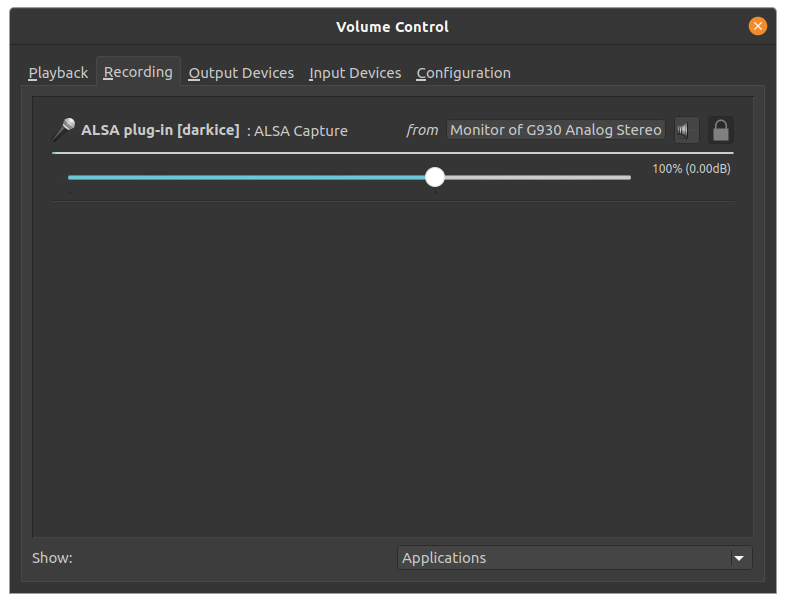
If you don’t see these controls, make sure darkice is running.
4- In the “from” dropdown box, select the sound device you want to capture from.
5- And voilà ! This should do it and you should now be able to hear your audio on your icecast stream.
You got a certificate and configured your server/hosting to serve pages on HTTPS. You’re almost there !
Here is how to make sure that all visitors use HTTPS now.
Go to your WordPress administration interface and choose “Settings” in the menu. Make sure that “WordPress address (URL)” and “Site address (URL)” begin with “https://”.
Save the changes.

This settings ensures WordPress generates HTTPS URLs when displaying links to your pages, blog posts embedded images, etc.
We also want to make sure that all incoming traffic ends up using HTTPS. For this we need to edit the “.htaccess” file which can be found at the root directory of your WordPress installation.
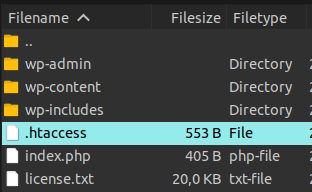
If you do not know how to access the files on your server, please ask your provider !
Edit the file and add these lines at the beginning of the file, before the “## BEGIN WORDPRESS” line :
RewriteEngine On
RewriteCond %{HTTPS} !=on
RewriteRule ^(.*)$ https://%{HTTP_HOST}%{REQUEST_URI} [L,R=301,NE]
Save the changes, and voilà!
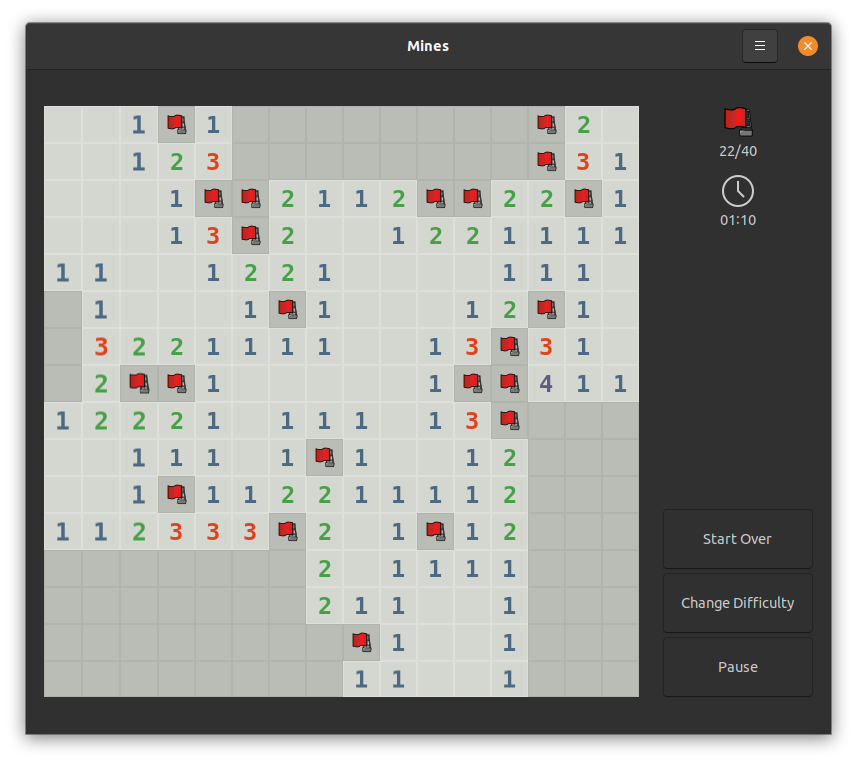
Gnome Mines is a minesweeper clone bundled with the Gnome Desktop for GNU/Linux. While the game is addicting as always, the default themes can be a little hard on the eyes.
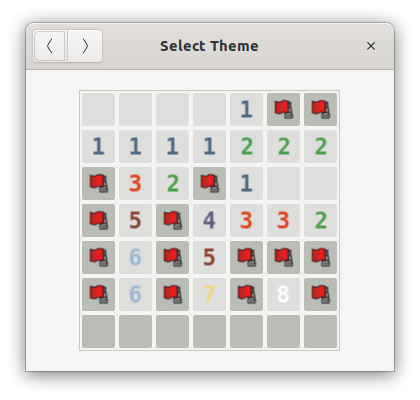
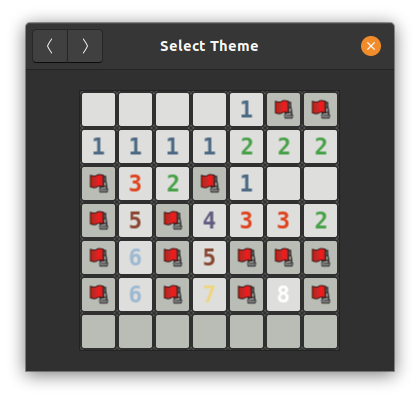
In the screenshots above, the large border between the tiles can cause some people to experience visual artifacts due to a grid illusion. The default themes also use the window background color to fill the space between the tiles, so changing your desktop environment’s GTK theme can drastically change the appearance of your minefield!
Happily we can fix this easily with a custom theme.
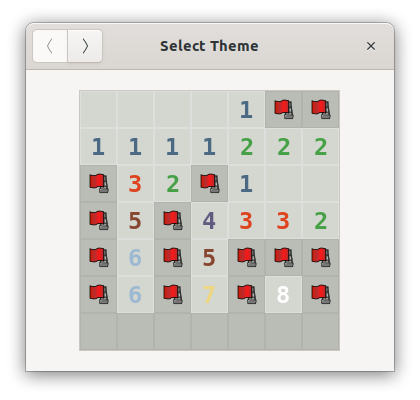
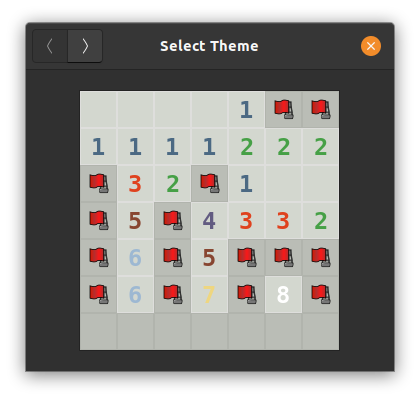
I slightly tweaked the default theme to have narrower gaps between the tiles, thus greatly reducing the grid illusion effect. I also changed the colors to be independent from the GTK theme.
~/.themes/gnome-mines gsettings set org.gnome.Mines theme '/path/to/folder/smooth/'Please note: if you change the theme via the theme selector in Gnome Mines, you will have to execute the command above again to go back to the custom theme.